CHO DNA ASSAY KIT
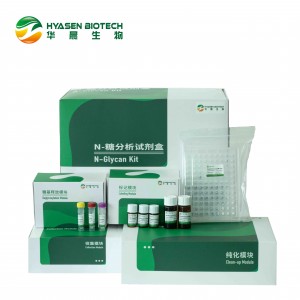
The CHO DNA assay Kit, can be used as quantitative determination of CHO cellular residual DNA in biological products (e.g. recombinant protein, antibodies, vaccines, etc) with qPCR detection principle on TaqMan fluorescent probes.
The kit has the characteristics of high-speed and high specificity. The detection method can be traced back to China pharmacopoeia method.
Reagents and Materials Provided
|
S/N |
Component |
Concentration |
Storage Conditions |
|
1 |
CHO DNA Positive Control |
30ng/μL 50μL |
-25℃~-15℃ |
|
2 |
Compound of primers and probes |
0.5mL |
-25℃~-15℃,away from light |
|
3 |
qPCR Master Mix |
1.5mL |
-25℃~-15℃,away from light |
|
4 |
DNA Dilution Buffer |
1.5mL |
-25℃~-15℃ |
Storage and stability
Valid for 24 months, Store at -25~-15℃ for long term storage and use dry ice or ice bag to keep it cold during.
Reagent preparation CHO DNA Positive Control standard curve samples
The concentration of CHO DNA Positive Control is marked on tube wall label. Check the actual concentration before dilution. Dilute CHO DNA Positive Control with DNA dilution buffer in kit by serial dilution method. The diluted concentration is as follows:
3000pg/μL, 300pg/μL,30pg/μL,3pg/μL,0.3pg/μL, 0.03pg/μL, 0.003pg/μL.
The specific operating steps are as follows:
1. Take and thaw CHO DNA Positive Control and DNA Dilution Buffer stored at -20℃ . Vortex and mix slightly after completely melted then centrifuge rapidly for 2-5 seconds.
2. Take 7 low retention centrifuge tubes and mark them as ST0, ST1, ST2, ST3, ST4, ST5 and ST6. Prepare CHO DNA standard samples according to the following table. Mix with vortex mixer then centrifuge rapidly for 2-5 seconds before starting the next serial dilution. Store the diluted standard sample at 2~8 ℃ and it should be prepared when using.
|
Dilution Tube |
Dilution Steps |
Concentration(pg/μ) |
|
ST0 |
10μL DNA Positive Control + 90μL DNA Dilution Buffer |
3000 |
|
ST1 |
10μL ST0 + 90μL DNA Dilution Buffer |
300 |
|
ST2 |
10μL ST1 + 90μL DNA Dilution Buffer |
30 |
|
ST3 |
10μL ST2+ 90μL DNA Dilution Buffer |
3 |
|
ST4 |
10μL ST3 + 90μL DNADilution Buffer |
0.3 |
|
ST5 |
10μL ST4 + 90μL DNADilution Buffer |
0.03 |
|
ST6 |
10μL ST5 + 90μL DNADilution Buffer |
0.003 |
The thawed but unused DNA Dilution Buffer can be temporarily stored at 2-8℃
Preparation of spike-and-recovery quality control samples (ERC)
Prepare the spike-and-recovery sample of CHO DNA(ERC) as required. (It is suggested that the amount of added standard should be set to 2-30 times of the historical testing value of the sample with no spike). Take the preparation of ERC sample with 30pg CHO DNA as an example. The specific operating steps are as follows:
1. Add 100μL of testing sample into 1.5mL low retention centrifuge tube.
2. Add 10μL of ST3, vortex and mix well then mark the centrifuge tube as ERC testing sample.
3. ERC sample should be pre-processed
together with the same batch of testing samples then ERC extracted solution sample can be prepared.
Preparation of negative control sample
Set negative control as specified by experiments, the specific operating steps are as follows:
1. Add 100μL of matrix solution sample (or DNA Dilution Buffer) into 1.5mL low retention centrifuge tube and mark the tube as NCS. NCS should be pre-processed together with the same batch of testing samples then NCS extracted solution can be prepared.
qPCR reaction systems
1.Calculate the required number of reaction wells according to the detected standard curve and the number of samples to be tested.
Number of reaction wells= (standard curve samples of 6 concentration gradient+1BLK + 1 NCS + testing sample + ERC testing sample) ×3.
2. Calculate the required total amount of Compound of primers and probes and qPCR Master Mix according to the number of reaction wells:
Compound of primers and probes = (number of reaction wells+2) × 5 μ L (including 2 wells of loss quantity)
qPCR Master Mix = (number of reaction wells+2)×15 μL (including 2 wells of loss quantity)
3. Thaw reagents at room temperature. Prepare the reaction mix according to the calculated amount of Compound of primers and probes and qPCR Master Mix in step 2 above. Then vortex and mix slightly. Add samples according to the following table:
|
Standard Curve |
20μL reaction mix + 10μL ST1/ST2/ST3/ST4/ST5/ST6 |
|
BLK |
20μL reaction mix + 10μL DNADiluent |
|
NCS |
20μL reaction mix + 10μL NCS NCS Extracted Solution |
|
Testing Sample SAM |
20μL reaction mix + 10μL DNA sample Extracted solution to be tested |
|
Testing Sample ERC |
20μL reaction mix + 10μL ERC extracted solution |
Sample adding of qPCR reaction
1. Take a 96-well PCR plate and add 20μL reaction mix into each well.
2. According to Table 4, add BLK, NCS, SAM, ERC, and then add 10μL of ST1, ST2, ST3, ST4, ST5 and ST6 DNA standard solution in due order. Three replicates were made for each sample.
3. Seal the plate with adhesive membrane and centrifuge for qPCR reaction.
qPCR instrument running program settings
Take Applied Biosystems® 7500 Fast qPCR instrument as an example.
1. Create a blank new program and select the absolute quantitative detection template.
2. Create a new detection probe, name it asm “CHODNA”, select the reporter fluorophore as FAM, the quencher fluorophore as TAMRA, and the detection reference fluorescence as ROX.
3. Set up a two-step reaction program:
4. Pre-denaturation at 95℃ for 10 min, 95℃ for 15s, 60℃ for 1 min with 40 cycles. The reaction volume is 30μL.
Standard curve PCR results:
Result
Calculate the amount of DNA residues in the testing sample as follows:
Calculation of variation coefficient of duplicated wells:
For example, if the test result of the DNA extraction sample is near the lower limit of detection (ST6) (Ct value ± 2 cycles) or the test result Ct value is more than ST6, the coefficient of variation is not calculated.
2. Calculation of standard addition recovery
When spiked samples have been processed with the same way as the samples, DNA content of spiked samples can be calculated according to PCR standard curve equation and Ct value of spiked samples. The recovery rate can be calculated according to labeled amount of standard addition.
Note:
When using chemicals, must wear appropriate lab coats, disposable gloves and goggles.
1. If the reagent can not be used up at one time, please store it in the refrigerator at -20℃
2. If you accidentally spill reagents into your eyes, mouth and nose during the operation, please rinse with plenty of water immediately.
3. Please stop using the kit if you find defacement on the label, test tube wall, or unclear writing.


